Managing your Multi-Factor Authentication (MFA) Enrollment
Remember: You can manage your MFA enrollment anytime through the MFA Setup portal at https://mfasetup.lsu.edu!
If you’re already familiar with MFA, you can jump to a specific section with the links below. If this is your first time enrolling in MFA or you’d like to understand more, please read through the rest of this article starting with “About Multi-Factor Authentication (MFA).”
In this article:
Setup Guides:
Other MFA articles:
Multi-factor authentication (MFA) provides an extra layer of security to your account by ensuring only you can approve valid log in attempts to your account. Multi-factor authentication pairs something you know (like your password) with something you have (like a cell phone, phone number, or other device that can verify you) to ensure that an attacker cannot login to your account without access to both methods.
After MFA is configured for your account, you will be asked to verify your sign-in during certain off-campus log in attempts to make sure that you, and only you, can log in to your account and access your personal and private data. More information about logging in with MFA can be found here: https://grok.lsu.edu/Article.aspx?articleid=19930
Because MFA is so important to secure your account, it is required to set up MFA for your LSU Office 365 account before you can access your mail.
Going forward, you will periodically be asked to re-verify your logins on trusted devices, as well as verify logins on new devices, so please make sure you’re enrolling with methods you will have continued access to, don’t delete your verification app, and update your MFA methods when you have any modifications to your devices or phone numbers.
Currently, applications behind Microsoft authentication like Office 365 (LSUMail, Microsoft Office applications, OneDrive, Teams), Box, and Zoom are protected by MFA.
Whether it is your first time setting up MFA for your account, or you just need to update your phone number or add a new authenticator app, the MFA Setup portal can always be accessed at https://mfasetup.lsu.edu. Please note that you will need access to at least one of your MFA verification methods to sign-in to the MFA setup portal, even if you are on campus.
[back to top]
There are three different types of verification:
- The Microsoft Authenticator notification which provides a secure notification for approval on your device.
- A phone call to a primary or an additional alternate phone number. You must answer a phone call then press “#” on your phone at the automated prompt.
- A verification code that is uniquely generated by an app (like Microsoft Authenticator, Google Authenticator, Authy) every thirty seconds. You must type the current 6-digit code shown on the app at the login prompt after entering your username and password.
You should configure one of the three methods as your primary method and configure at least one extra alternate method to use as a backup (for example, you might lose your phone or not be able to receive a phone call—having access to a second method makes sure you always have the ability to access your account). Ideally, you should have a backup method on a completely separate device from your primary device. Use an alternate authentication phone number that is not tied to your primary phone or configure a code generator on a second device.
When choosing your primary and alternate methods, please consider the following situations to help you make the best choice:
- The Microsoft Authenticator app requires an internet connection (mobile data or Wi-Fi) to receive the approve or deny notification; however, no internet connection is needed for the six digit verification code. The app is available for most smart phones and tablets.
- The phone call method requires you to have access to the specified phone number and that phone needs to have cellular service to receive a call.
- A verification code should always work even if your device doesn’t have an internet connection. Verification codes are the most versatile method and serve as a great backup!
We strongly recommend utilizing the Microsoft Authenticator app as your primary verification method. It allows you to use both the push notification with number matching as well as the verification code. We have found that users who install and use the Microsoft Authenticator app have the best and most consistent MFA experience.
When configuring a phone number, we recommend using your personal cell phone number since this is the number that you will most likely have available to you when trying to log in from off-campus. It does not have to be a cell phone number (and it doesn’t have to be a smart phone, either), but please make sure that any number you use for MFA enrollment is one that you expect to have access to when trying to verify a sign in. The number you use for your authentication phone, or alternate authentication phone, will not be published or used for anything other than verifying your sign-in with Microsoft.
Please do not use your office phone as a verification method. Your office phone may be automatically populated in the system and available as an enrollment method. MFA will be required when you are off-campus, so if you make your office phone the default verification method (or your only verification method), you will not be able to approve your valid logins and may not be able to access your account from off-campus. Additionally, office phone numbers started moving to Microsoft Teams in 2022. If your office phone number is provided through Microsoft Teams, it is incompatible with the MFA verification call and cannot be used to verify any sign on. It is not a viable backup method.
Verification codes are provided by code generator apps that can be configured on multiple devices, like your primary cell phone, tablets, and computers. They require the most work to use but are the most stable and versatile method. You can enroll up to five different code generator apps. The Microsoft Authenticator will provide a verification code for you as a backup, but if you’re not using the Microsoft Authenticator, a code generator is a useful alternate verification method. If you travel internationally, it is strongly recommended that you configure a code generator.
If you’re ready, jump directly to the setup guides below: Setup Guides
[back to top]
Having alternate backup methods ensures you’re always in control of your account.
Your phone might break or get lost. You may be traveling without cellular service. Maybe you had to upgrade your phone and lost access to your original authenticator app.
If you only configure a single factor, you won’t be able to validate your own legitimate access to your account if you lose access to your single primary factor! Because MFA verification is also required to modify your MFA enrollment, you will be unable to fix your access yourself unless you can regain access to that factor later.
Ideally, you should have a backup method configured on a different device than your primary device. If your primary phone is used for the verification call and the Microsoft Authenticator notification, you may lose access to both factors at once. For example, what will happen if you lose your phone and have to get a completely new phone and phone number? We recommend making use of the alternate authentication phone number or making sure to configure the Microsoft Authenticator or other verification code generator on a completely separate device.
You can request an MFA reset through the LSU Service Desk after identity verification with a service desk analyst. Having multiple distinct verification methods puts you in control and ensures you’re always able to sign-in and manage your account when you need it the most.
Remember! Multi-factor verification is not a one-time only verification. You will need continued access to your verification methods as long as you’re using your account. Most apps can be configured to remember your verification for 30 days before requesting re-verification.
If you need to know what methods you have available, add methods, or change methods, please visit the MFA Setup portal (https://mfasetup.lsu.edu).
If you’re ready, jump directly to the setup guides below: Setup Guides
[back to top]
The best verification factor for users who travel is the verification code. An app that generates verification codes should be configured on all devices you travel with. These apps do not need Wi-Fi access or cellular service to generate valid login codes for you.
The Microsoft Authenticator automatically provides a verification code if you have configured notifications.
Other code generator apps can be configured on phones, tablets, or laptops to ensure you always have access to a verification code when abroad.
If you have both domestic and international phone numbers, you can configure the number you use most often as your primary authentication phone and list your other phone as the alternate verification phone. This will ensure you can answer verification phone calls at home and abroad. However, we still recommend the verification code as the most reliable method.
To set up a verification code, access the MFA Setup portal (https://mfasetup.lsu.edu) and follow the verification code setup instructions below: Verification code
[back to top]
You will need access to at least one of your previously enrolled factors. If you do not have access to any of your MFA factors, please try again later when you will have access or contact the Service Desk for an MFA reset only if none of your factors are available to you anymore.
Access the MFA Setup portal by going to https://mfasetup.lsu.edu
You may be asked to sign in with your username and password. Then, you will have to verify your sign on with one of your enrolled factors.
The portal will show you all your currently configured or available MFA factors. For example, in the screenshot below, this user has the Microsoft Authenticator configured and set as default as well as a phone number and third-party authenticator app enrolled.
In this portal, you can delete, change, or add factors. Choose one of the highlighted links to make the appropriate change.
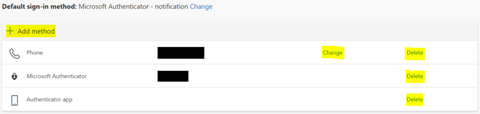
Only Phone numbers and Alternate phone numbers can be changed to a new number.
If you have a Microsoft Authenticator or other Authenticator app that is no longer valid, you can delete the enrolled app from your account.
Note: If your account has an office phone automatically configured, you may be able to enable it as a backup only from this portal. You will have to be at your office phone to answer the verification call. If your office phone is provided by Microsoft Teams, you will not be able to accept the verification call and successfully enroll with this method. This phone number is automatically populated and cannot be changed through the MFA portal.

Click “add method” to add another factor, like an alternate phone or authenticator app.
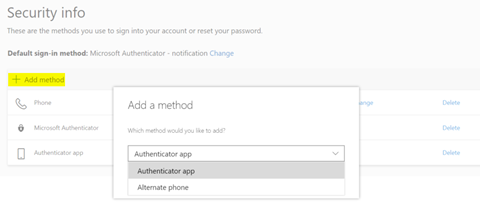
You will be required to verify any new method to confirm that it will work.
After making the required changes, don’t forget to check your default method before leaving the MFA portal. We recommend using the Microsoft Authenticator app as your default verification method.
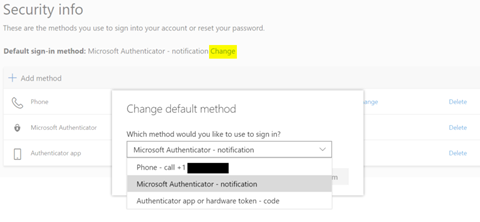
Note: If you have passwordless authentication configured through Microsoft Authenticator, the passwordless authentication notification may prompt before your default verification method. When not using passwordless authentication, the MFA push notification or phone call will only trigger after successfully entering your password. For more information, see the Passwordless Sign-in with Microsoft Authenticator article for more details: https://grok.lsu.edu/Article.aspx?articleid=20125
For more help configuring each type of authenticator, please reference the Setup Guides below.
[back to top]
We recommend going directly to the MFA Setup portal at https://mfasetup.lsu.edu through a computer or laptop to manage your MFA enrollment for the best experience.
Guides:
If you have not gone to the MFA Setup portal and try to access another service like LSUMail and you do not have any MFA factors enrolled yet, your sign on will be interrupted and you may be required to configure a verification method.
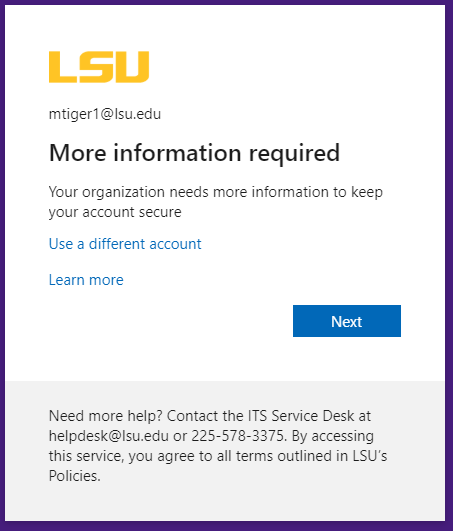
Note: In certain circumstances, you may be able to choose “Skip for now.” If you get the choice to skip enrollment, it will eventually be required once the 14-day countdown is complete or when you attempt a sign-in that requires MFA verification.
The first time you access the MFA setup portal through an interrupted sign in or by accessing the MFA Setup portal directly at https://mfasetup.lsu.edu, you will be asked to configure the Microsoft Authenticator app.
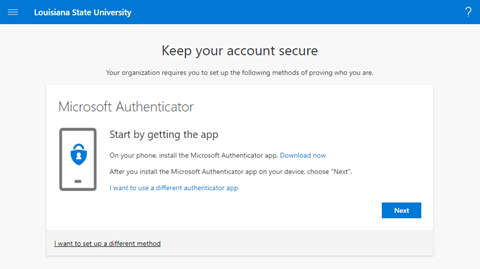
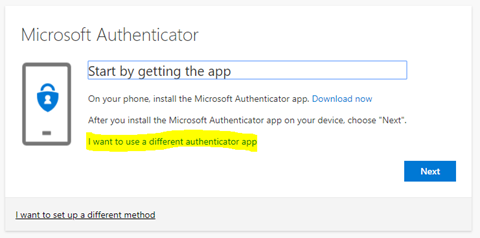
We recommend configuring the Microsoft Authenticator first as your primary verification method. However, if you would like to use a different factor than the Microsoft Authenticator, click “I want to use a different authenticator app” for other 3rd party code generators or “I want to set up a different method” to configure a phone call for verification.
You will initially have to configure at least one of the provided methods, but we strongly encourage configuring additional factors.
Follow the guides below to configure your preferred verification factors.
You will need
- Your smartphone or tablet
- The Microsoft Authenticator App on that device
- Internet connection through Wi-Fi or cellular data
Quick Tip: You can configure the Microsoft Authenticator on five devices. Having authenticators on multiple devices can help if your primary device breaks or is lost.
Warning: Do not uninstall the Microsoft Authenticator app or delete your account from the app after completing enrollment. You may lock yourself out of your account if you do not have another MFA method configured.
We strongly recommend the Microsoft Authenticator app as it is the easiest verification method and has the least issues.
During sign-on, your Microsoft Authenticator app will receive a notification on your verification device (usually your cell phone) asking you to approve or deny the logon. For enhanced security, you may be required to type in a number within the app that matches a number displayed during your sign on attempt. If you have enabled passwordless sign-in, you may also be asked to select a number on the phone notification that is displayed on the sign-in screen before approving the login.
Quick Tip: The Microsoft Authenticator app has the added benefit of providing verification codes in addition to the verification notification. This is useful if you are trying to verify a sign in but temporarily do not have internet access on your verification device.
To configure:
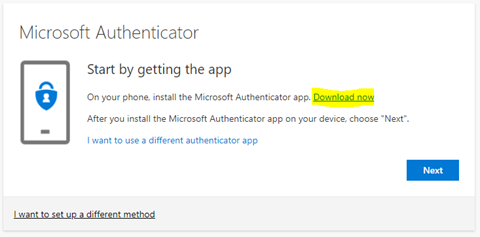
Step 1: Install the Microsoft Authenticator app.
- You can find and download Microsoft Authenticator yourself in the Apple App Store or the Google Play Store.
- You can choose “Download now” during enrollment to go to Microsoft’s page for the Microsoft Authenticator. This page gives direct links to each app store or the page can text you a download link automatically.
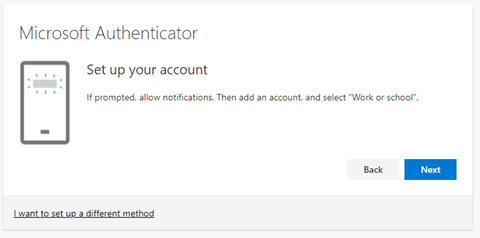
Step 2: Open the Microsoft Authenticator app on your device.
Note: If this is your first time opening the app, you may have to allow notifications. You will also have to allow access to the camera, which is only used to scan the unique enrollment QR code that is generated for your account.
Follow the instructions in the MFA setup portal. On your phone, you will need to set up the authenticator app for a work or school account.
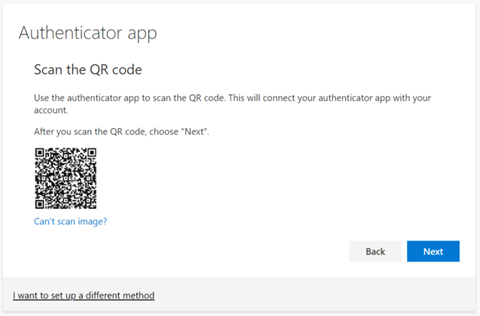
Step 3: Scan the QR code provided by MFA setup portal on your device with the Microsoft Authenticator app. If you’re unable to scan the code because of device issues or for devices without a camera, you can use the “Can’t scan image?” link to receive your “Code” and “URL” to enter directly into the Microsoft Authenticator app.
Note: The QR code is unique to your account. Treat this QR code like a password as this QR code can be used to set up an app to approve logins to your account.
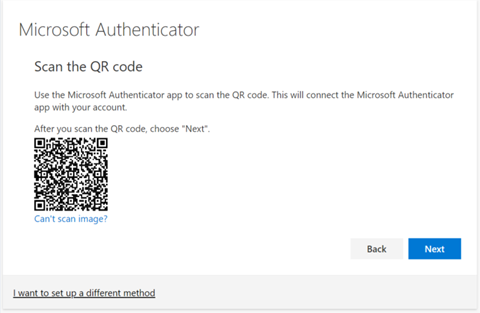
Note: This step is time sensitive. If the app fails after scanning the QR code you may need to go back and restart this step to get a new, unexpired QR code.
Step 4: Your phone app will continue into your “Accounts” list after successfully scanning the QR code. You should see “Louisiana State University” and your email address with a 6-digit number that changes every thirty seconds. You can ignore this 6-digit code for now. It can be used as a backup verification method later. Just hit next in the MFA enrollment portal.
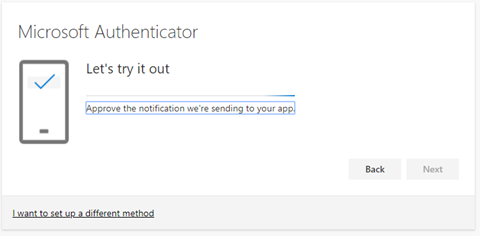
After hitting next in the MFA enrollment portal, you will be asked to approve the phone notification to continue. You may be shown a two digit number. This will need to be provided back to the app in the next step.
Step 5: Back on your phone, approve the notification by typing in the two digit code displayed during enrollment (either within the Microsoft Authenticator app or through a notification that should pop up at the top of your phone like a text message or email) to confirm that the Microsoft Authenticator has been configured correctly for your account.
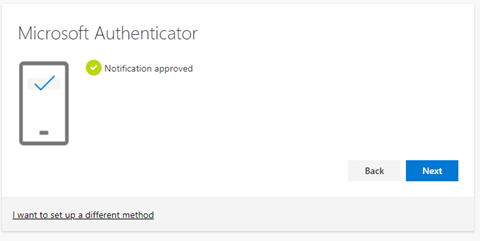
Step 6: Hit next to complete enrollment. If the Microsoft Authenticator is your only authentication method, please go to the MFA Setup portal (http://mfasetup.lsu.edu) to configure additional methods using the guidance in this article.
If you have configured the Microsoft Authenticator for notifications, you can enable passwordless sign-in for your account. When you enable passwordless sign-in, you will be able to sign-in with just your username and a special verification notification on your phone. You will not have to provide your password or perform additional MFA verification. For more details on how to set up and use passwordless sign-in through the Microsoft Authenticator app, please visit our GROK article: https://grok.lsu.edu/Article.aspx?articleid=20125
[back to guides]
[back to top]
You will need
- An off-campus phone
- Cellular service to receive calls
During sign-on, you will receive a phone call from Microsoft with an automated prompt asking you to hit pound (#) on your phone to verify the sign-in.
To configure:
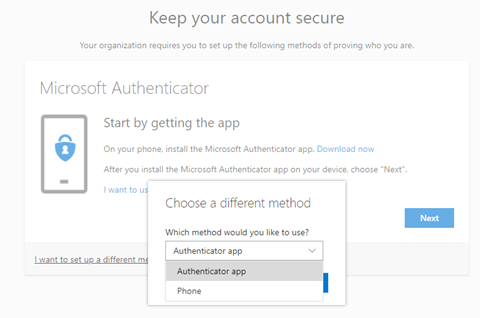
To access the phone enrollment option, you may need to choose "I want to set up a different method" on the initial Microsoft Authenticator enrollment screen if this is your first time setting up MFA.
Step 1: Enter your authentication phone number. Remember: you will have to answer calls on this phone when you are attempting to sign-in from off-campus.

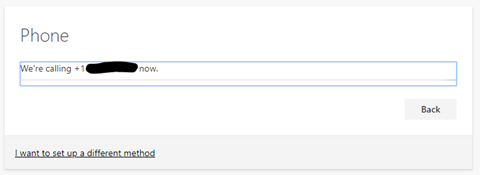
Step 2: Hit next. The system will attempt to call the provided number.
Note: Not getting the call? The phone call should come from +1 (866) 539 4191, +1 (855) 330 8653, or +1 (877) 668 6536. You should make sure that you do not block these numbers, do not have your phone on "Do not disturb," do not have your phone configured to silence unknown callers, or have other service issues that may prevent you from answering the call. Please note, Microsoft will only attempt to call your verification number three times during enrollment to prevent the service from being abused to send repeated calls to different numbers. If you have failed to receive, rejected, or do not answer the call three times you may get stuck on a screen that says "We're sorry, we ran into a problem. Please select 'Next' to try again." When hitting next, you will still not receive the call. If this happens, you can still configure an app but you will not be able to re-try the verification call to an authentication phone or alternate phone for at least 3 hours.
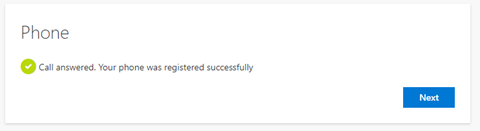
Step 3: Answer the phone call. An automated, LSU personalized, prompt will ask you to hit pound (#) on your phone to verify your sign-in. Answering this successfully will enroll this phone number for verifications on your account. You should get the following success message after answering the call.
Quick Tip: You can hit pound at any point during the message. You do not have to wait for the message to finish. If you wait too long, the call will time out and verification will fail.
Step 4: Hit next to complete enrollment. If your phone is your only authentication method, please go to the MFA Setup portal (https://mfasetup.lsu.edu) to configure additional methods using the guidance in this article.
[back to guides]
[back to top]
You will need
- A code generator application on your phone, tablet, or laptop
- Examples: Google Authenticator, Authy, etc.
Quick Tip: You can configure up to five different code generators (in addition to any Microsoft Authenticator installations you have configured). Having authenticators on multiple devices can help if your primary device breaks or is lost.
Note: If you have configured the Microsoft Authenticator for notifications, it has automatically configured a verification code for you in the Microsoft Authenticator app. Use these instructions only for setting up a third-party code generator.
During sign-on, you will be asked to provide the 6-digit code from your authenticator app to verify your logon.
To configure:
Step 1: Install a code generator app (Google Authenticator, Authy, etc.) or open a code generator app that you already use.
Step 2: In the MFA setup portal, click the “I want to use a different authenticator app” link to start the enrollment for third party code generators. If you miss this step, the QR code will only be valid for the Microsoft Authenticator app.
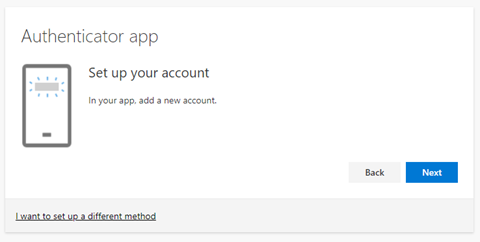
Step 3: Open the third-party authenticator app. Each app will be different, but you should have the option to add a new account within your chosen app. When the app is ready, hit next in the MFA enrollment portal.
Step 4: Scan the new QR code with your app of choice. If you’re unable to scan the code because of device issues or for devices without a camera, you can use the “Can’t scan image?” link to receive your “Account name” and “Secret key” to type or paste into your chosen authenticator app.
Note: The QR code is unique to your account. Treat this QR code like a password as this QR code can be used to set up an app to approve logins to your account.
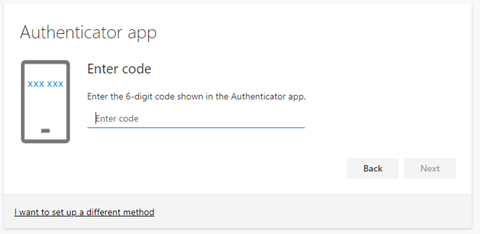
Step 5: Input the 6-digit code displayed by your app to confirm it has been configured correctly.
Step 6: Hit next to complete enrollment. If your code generator is your only authentication method, please go to the MFA Setup portal (https://mfasetup.lsu.edu) to configure additional methods using the guidance in this article.
[back to guides]
[back to top]
If you’re having trouble with MFA, please refer to our MFA troubleshooting article (https://grok.lsu.edu/Article.aspx?articleid=19960) that covers common issues users have with MFA.
If your issues aren’t covered in this article or the troubleshooting article, you need additional help walking through some of these steps, or you require an MFA reset, please contact the LSU Service Desk.
[back to top]